View from top of a large bioherm in Marsh’s Quarry looking northwards along the Nodular Member ridge. Photo taken in the late 1950s.
PP20190226_0002.jpg
View looking northwards from the top of a large bioherm in Marsh’s Quarry , showing rocks of the Nodular Member. The Lower Quarried Limestone Member trench can be seen of the far right of the photo. Photo taken in the late 1950s.
PeterOliver_012.jpg
Platey nodular beds on the west side. Photo by Peter Oliver, c1966.
PeterOliver_019.jpg
Photo by Peter Oliver, c1966.
PeterOliver_008.jpg
Cherry Hole circa 1966. Nodular Beds. Photo by Peter Oliver.
Wrens Nest North West.jpg
The Wren's Nest North West, November 1972. Photo by Norman Dutton.
Wrens Nest Ripple Marks 2.jpg
The Wren's Nest Ripple Marks, November 1972. Photo by Norman Dutton.
Wrens Nest Ripple Marks.jpg
The Wren's Nest Ripple Marks, November 1972. Photo by Norman Dutton.
Wrens Nest West Bedding Planes.jpg
The Wren's Nest West Bedding Planes, November 1972. Photo by Norman Dutton.
Wrens Nest West.jpg
The Wren's Nest West, November 1972. Photo by Norman Dutton.
These exposures in the Nodular Member on the western side of Wren's Nest are a result of engineers excavating the rock face in order to gain access to the underlying mine workings in the Lower Quarried Limestone Member (see previous photo). The mine workings were subsequently partially infilled with sand. Photo by Peter Parkes 1973.
PPscan_0027.jpg
These exposures in the Nodular Member on the western side of Wren's Nest are a result of engineers excavating the rock face in order to gain access to the underlying mine workings in the Lower Quarried Limestone Member. The mine workings were subsequently partially infilled with sand. Photo by Peter Parkes 1973.
PPscan_0028.jpg
These exposures in the Nodular Member on the western side of Wren's Nest are a result of engineers excavating the rock face in order to gain access to the underlying mine workings in the Lower Quarried Limestone Member. The mine workings were subsequently partially infilled with sand. Photo by Peter Parkes 1973.
PPscan_0032.jpg
View looking northwards on the western side of Wren's Nest showing a deep trench (just left of centre) that was formed by the removal of the Upper Quarried Limestone Member. The trench has since been partially infilled and is now known as the Fossil Trench. Photo by Peter Parkes 1973.
PPscan_0033.jpg
View looking northwards on the western side of Wren's Nest showing several fractures in the rockface. These fractures were caused by subsidence that was a consequence of the demolition in 1961 of the pillars that supported the roof of the underlying mine workings in the Lower Quarried Limestone. Photo by Peter Parkes 1973.
PPscan_0034.jpg
View on the western side of Wren's Nest showing large bioherm just left of centre and ripple beds on the right. Photo by Peter Parkes 1973.
PPscan_0035.jpg
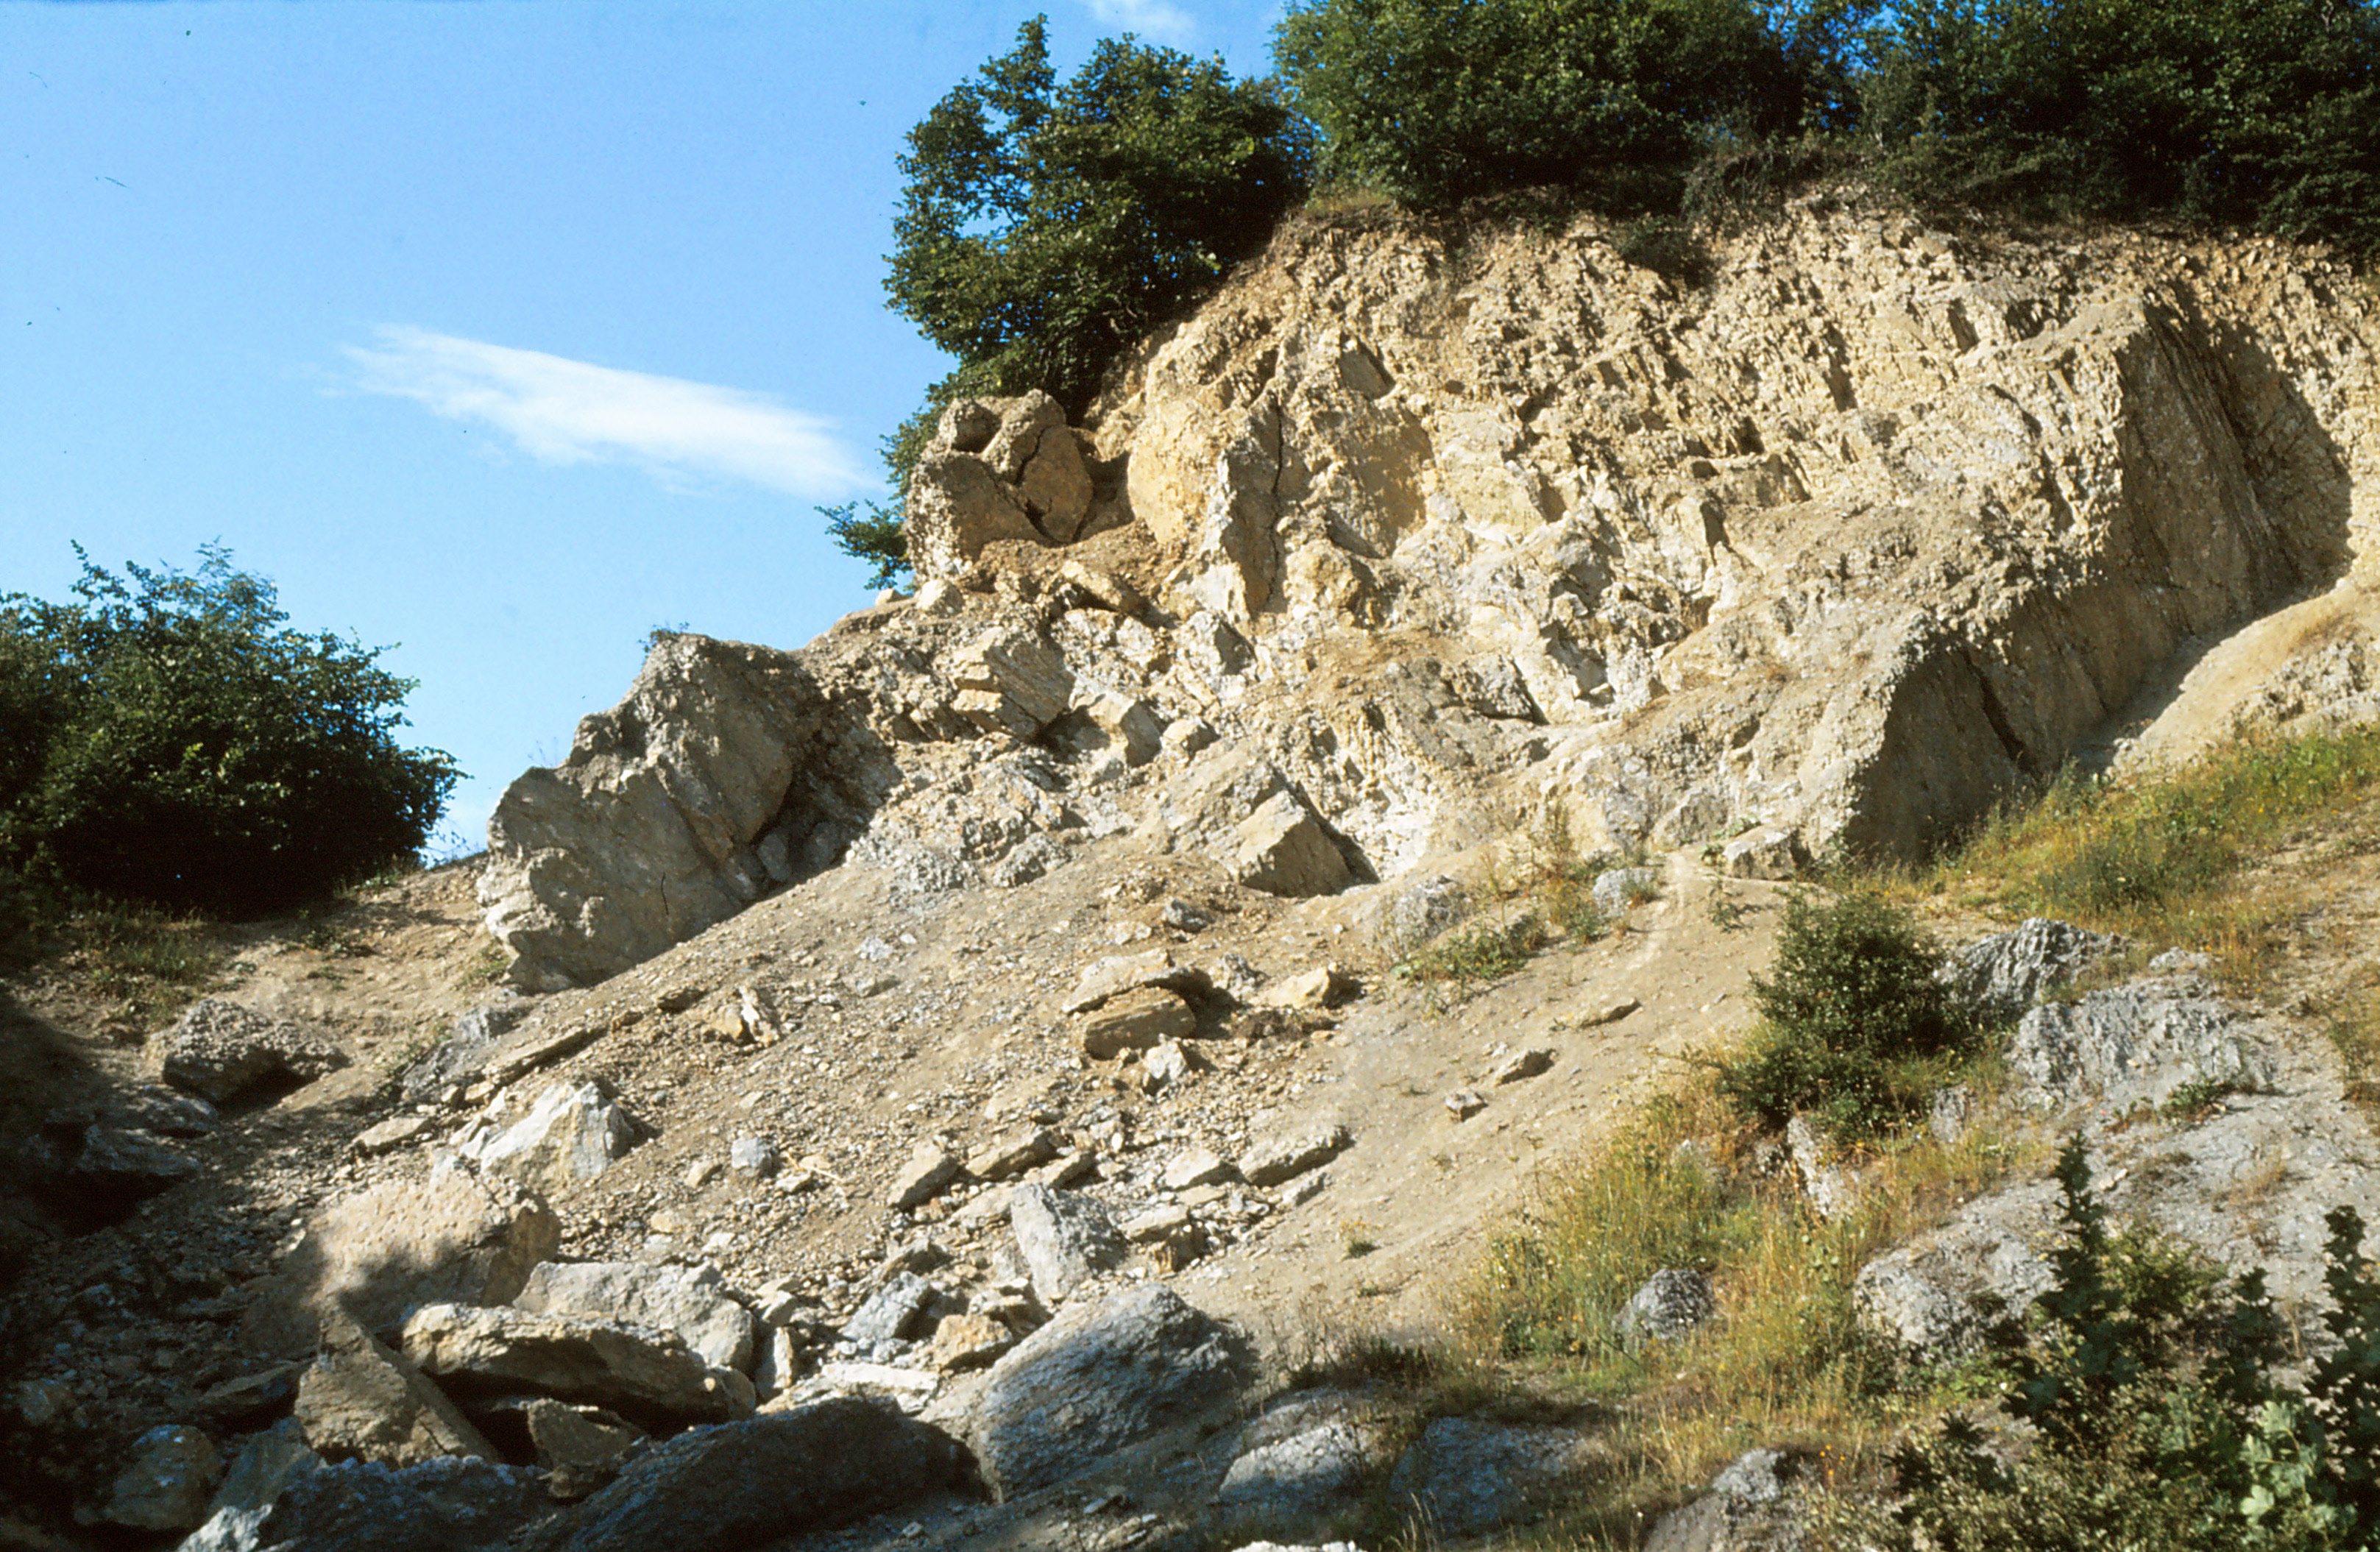
View on the western side of Wren's Nest showing beds dipping in a westerly direction. Photo by Peter Parkes 1973.
PP20181107__0005.jpg
Exposure showing reverse fault. The fault plane can be seen in the centre of the photo with the downthrown shales of the Lower Elton Formation on the left. On the right are the topmost beds of the Upper Quarried Limestone and overlying 'passage beds'. In the bottom right of the photo, the top of the infilled Lion's Mouth cavern can be seen. Photo by Peter Parkes, mid 1970s.
PP20181107__0006.jpg
A crown-hole in the nodular member known locally as the 'Cherry Hole'. The crown-hole was formed as a result of the collapse of the underground workings in the Lower Quarried Limestone Member. Photo by Peter Parkes, mid 1970s.
These first two photographs below are from the late 1950s and provide rare images of this exposure before it was decimated in 1961 when the pillars supporting the roof of the underlying cavern were blown out with the use of opencast gelignite and dynamite.
This shows the succession of rocks from the Coalbrookdale Formation (far left under trees) through the Lower Quarried Limestone Member and Nodular Member to the ripple beds that dip into the Upper Quarried Limestone Member (fossil) trench on the right.
After 1961 the now dislodged beds still showed the Lower Quarried Limestone Member/Nodular Member succession but in 1984 concerns were raised about the stability of the rock face and consequently the exposure of the Lower Quarried Limestone Member was demolished with the use of explosives.
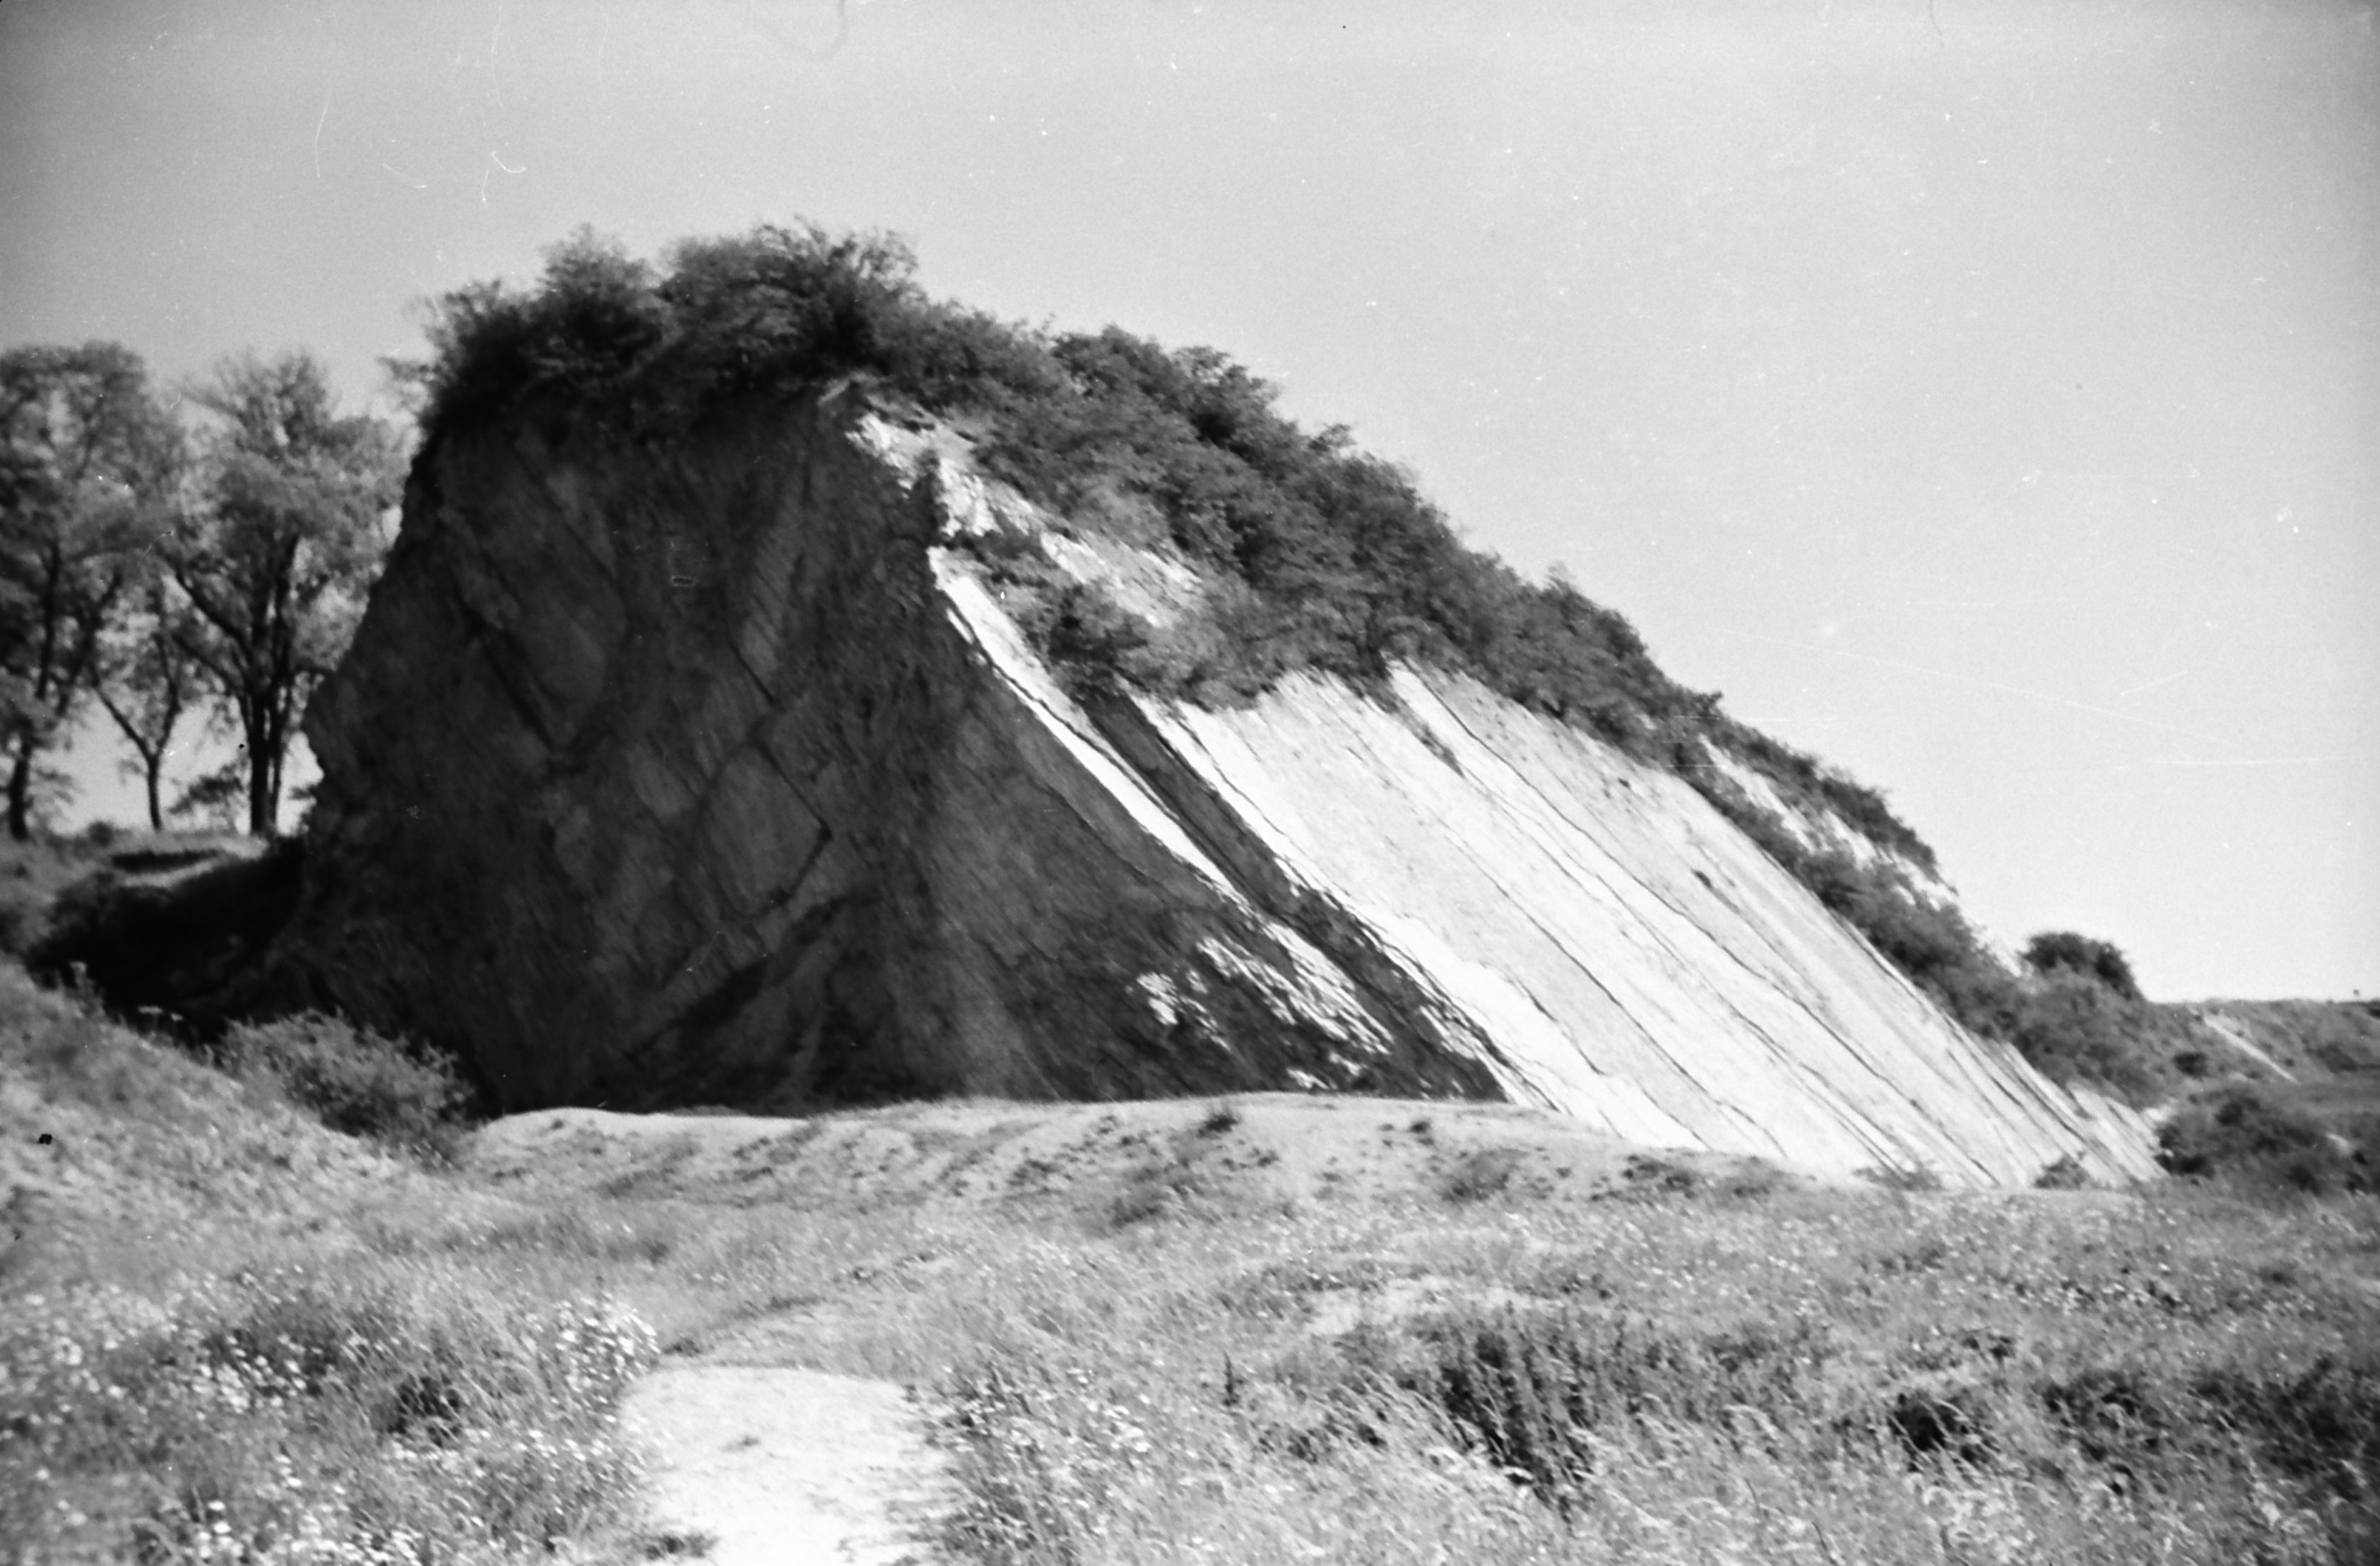
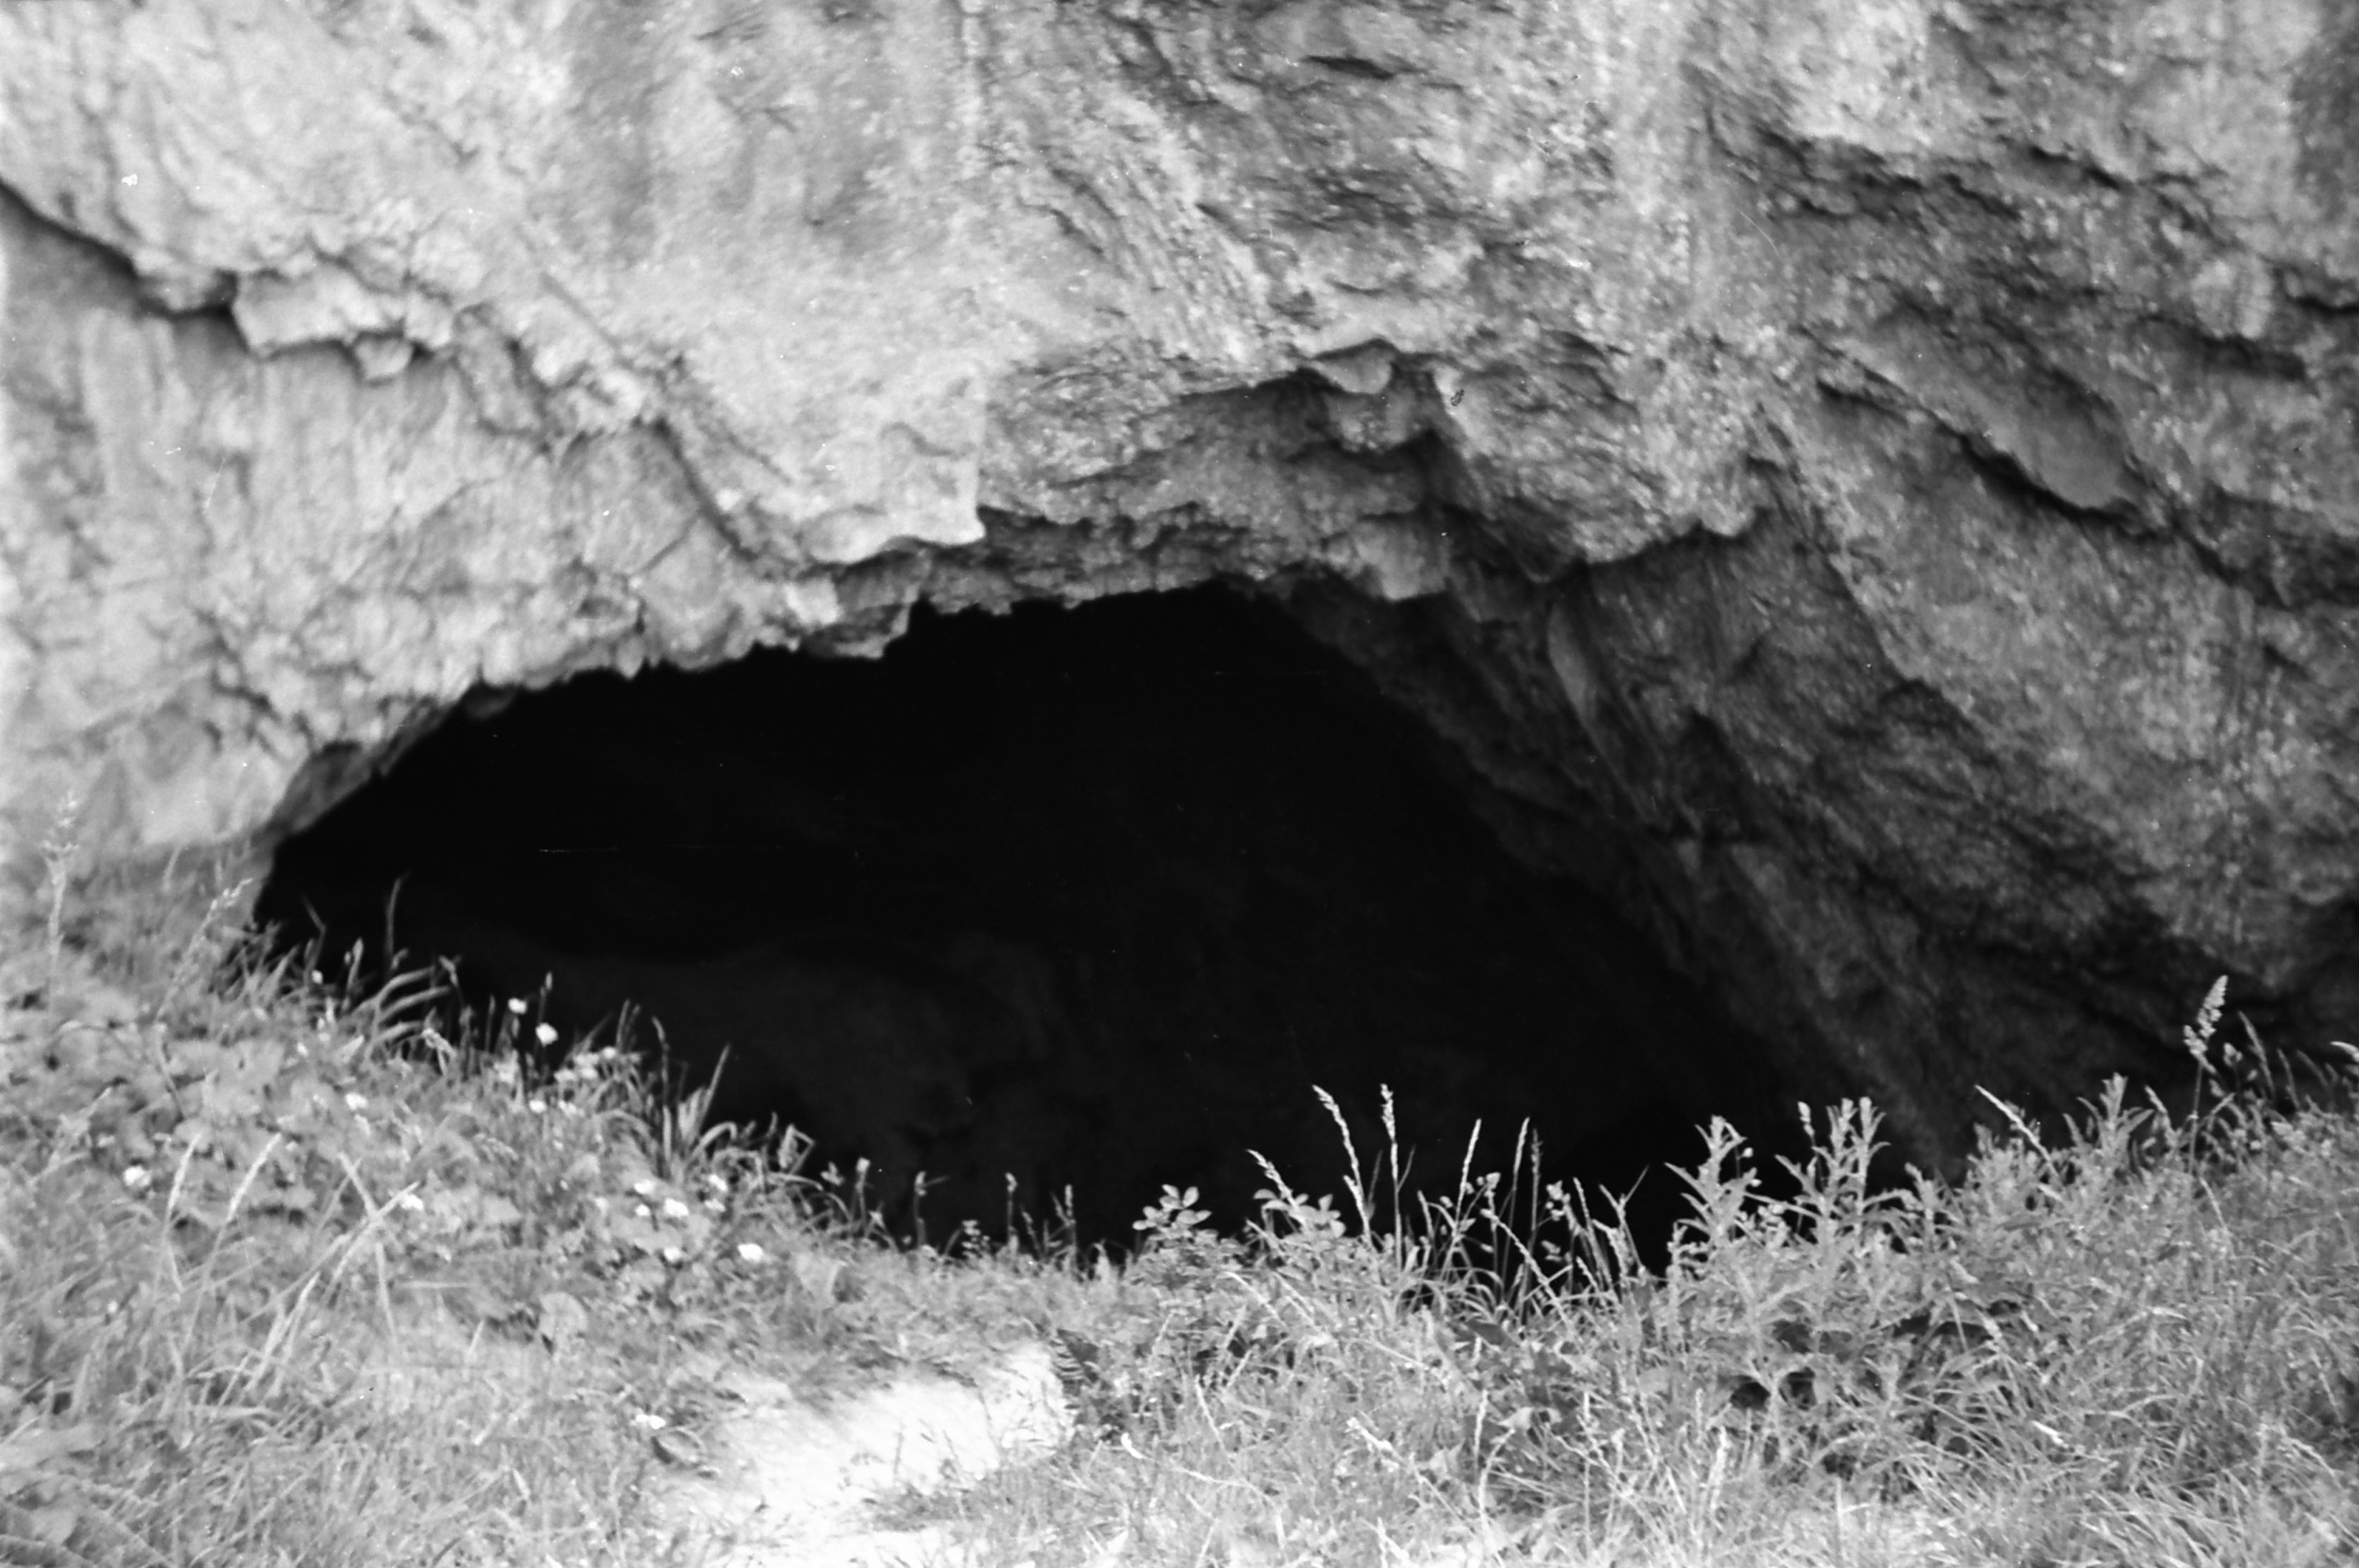
Devil’s Mouth Cavern entrance into the Lower Quarried Limestone Member was situated at the base of the exposure and can be seen (partly hidden) behind the bush on the left side of the photograph (above).
Devil’s Mouth Cavern.
The irregular rock formation around the opening suggests this mine entrance was driven through a large bioherm. Stromatoporoid and coral structures can be seen more clearly in the Express and Star photo of the Devil’s Mouth Cavern (below).
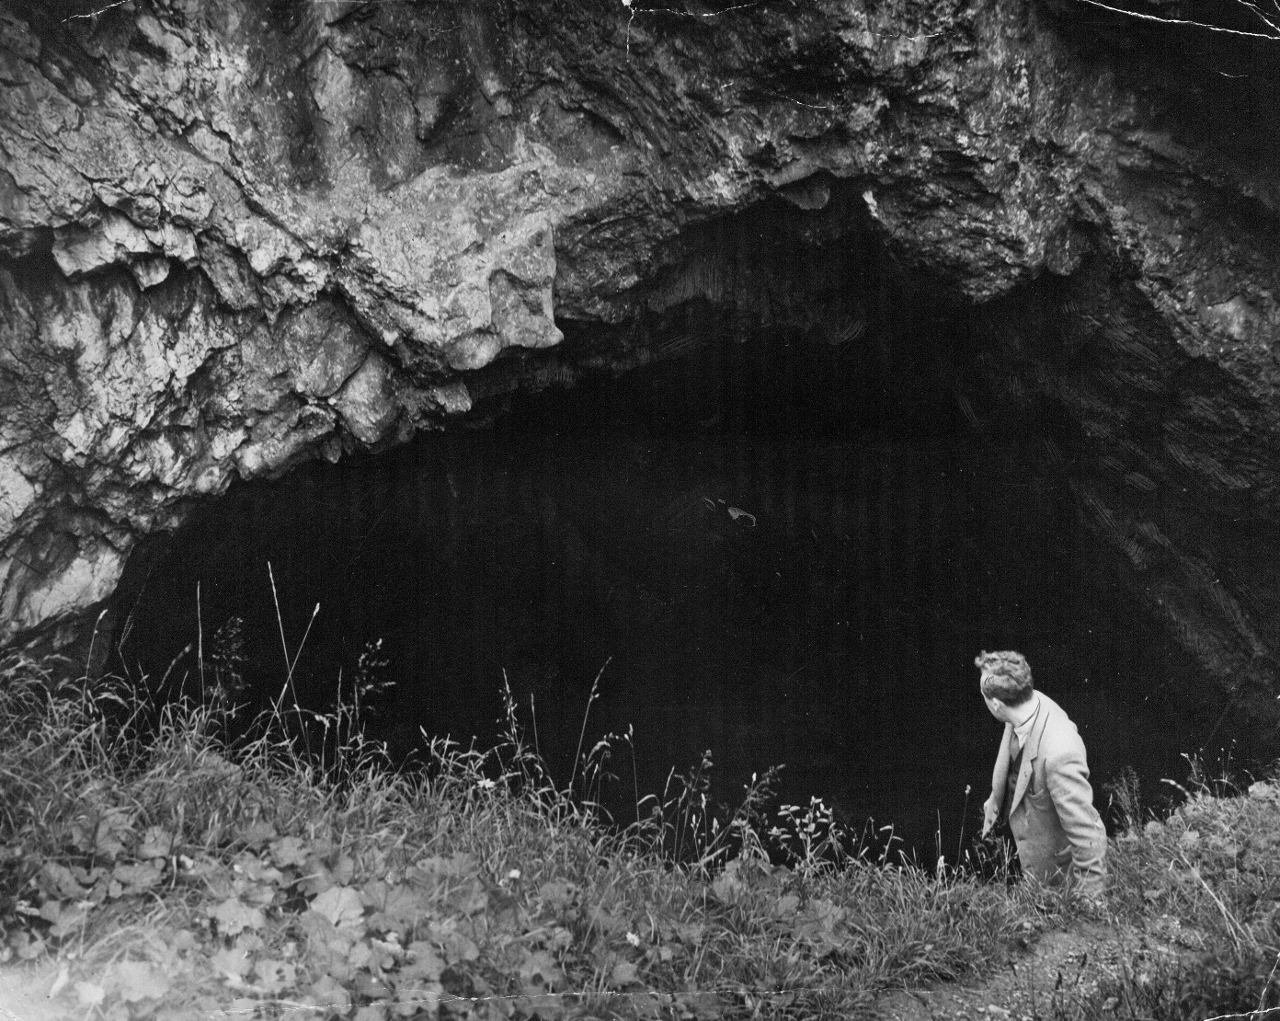
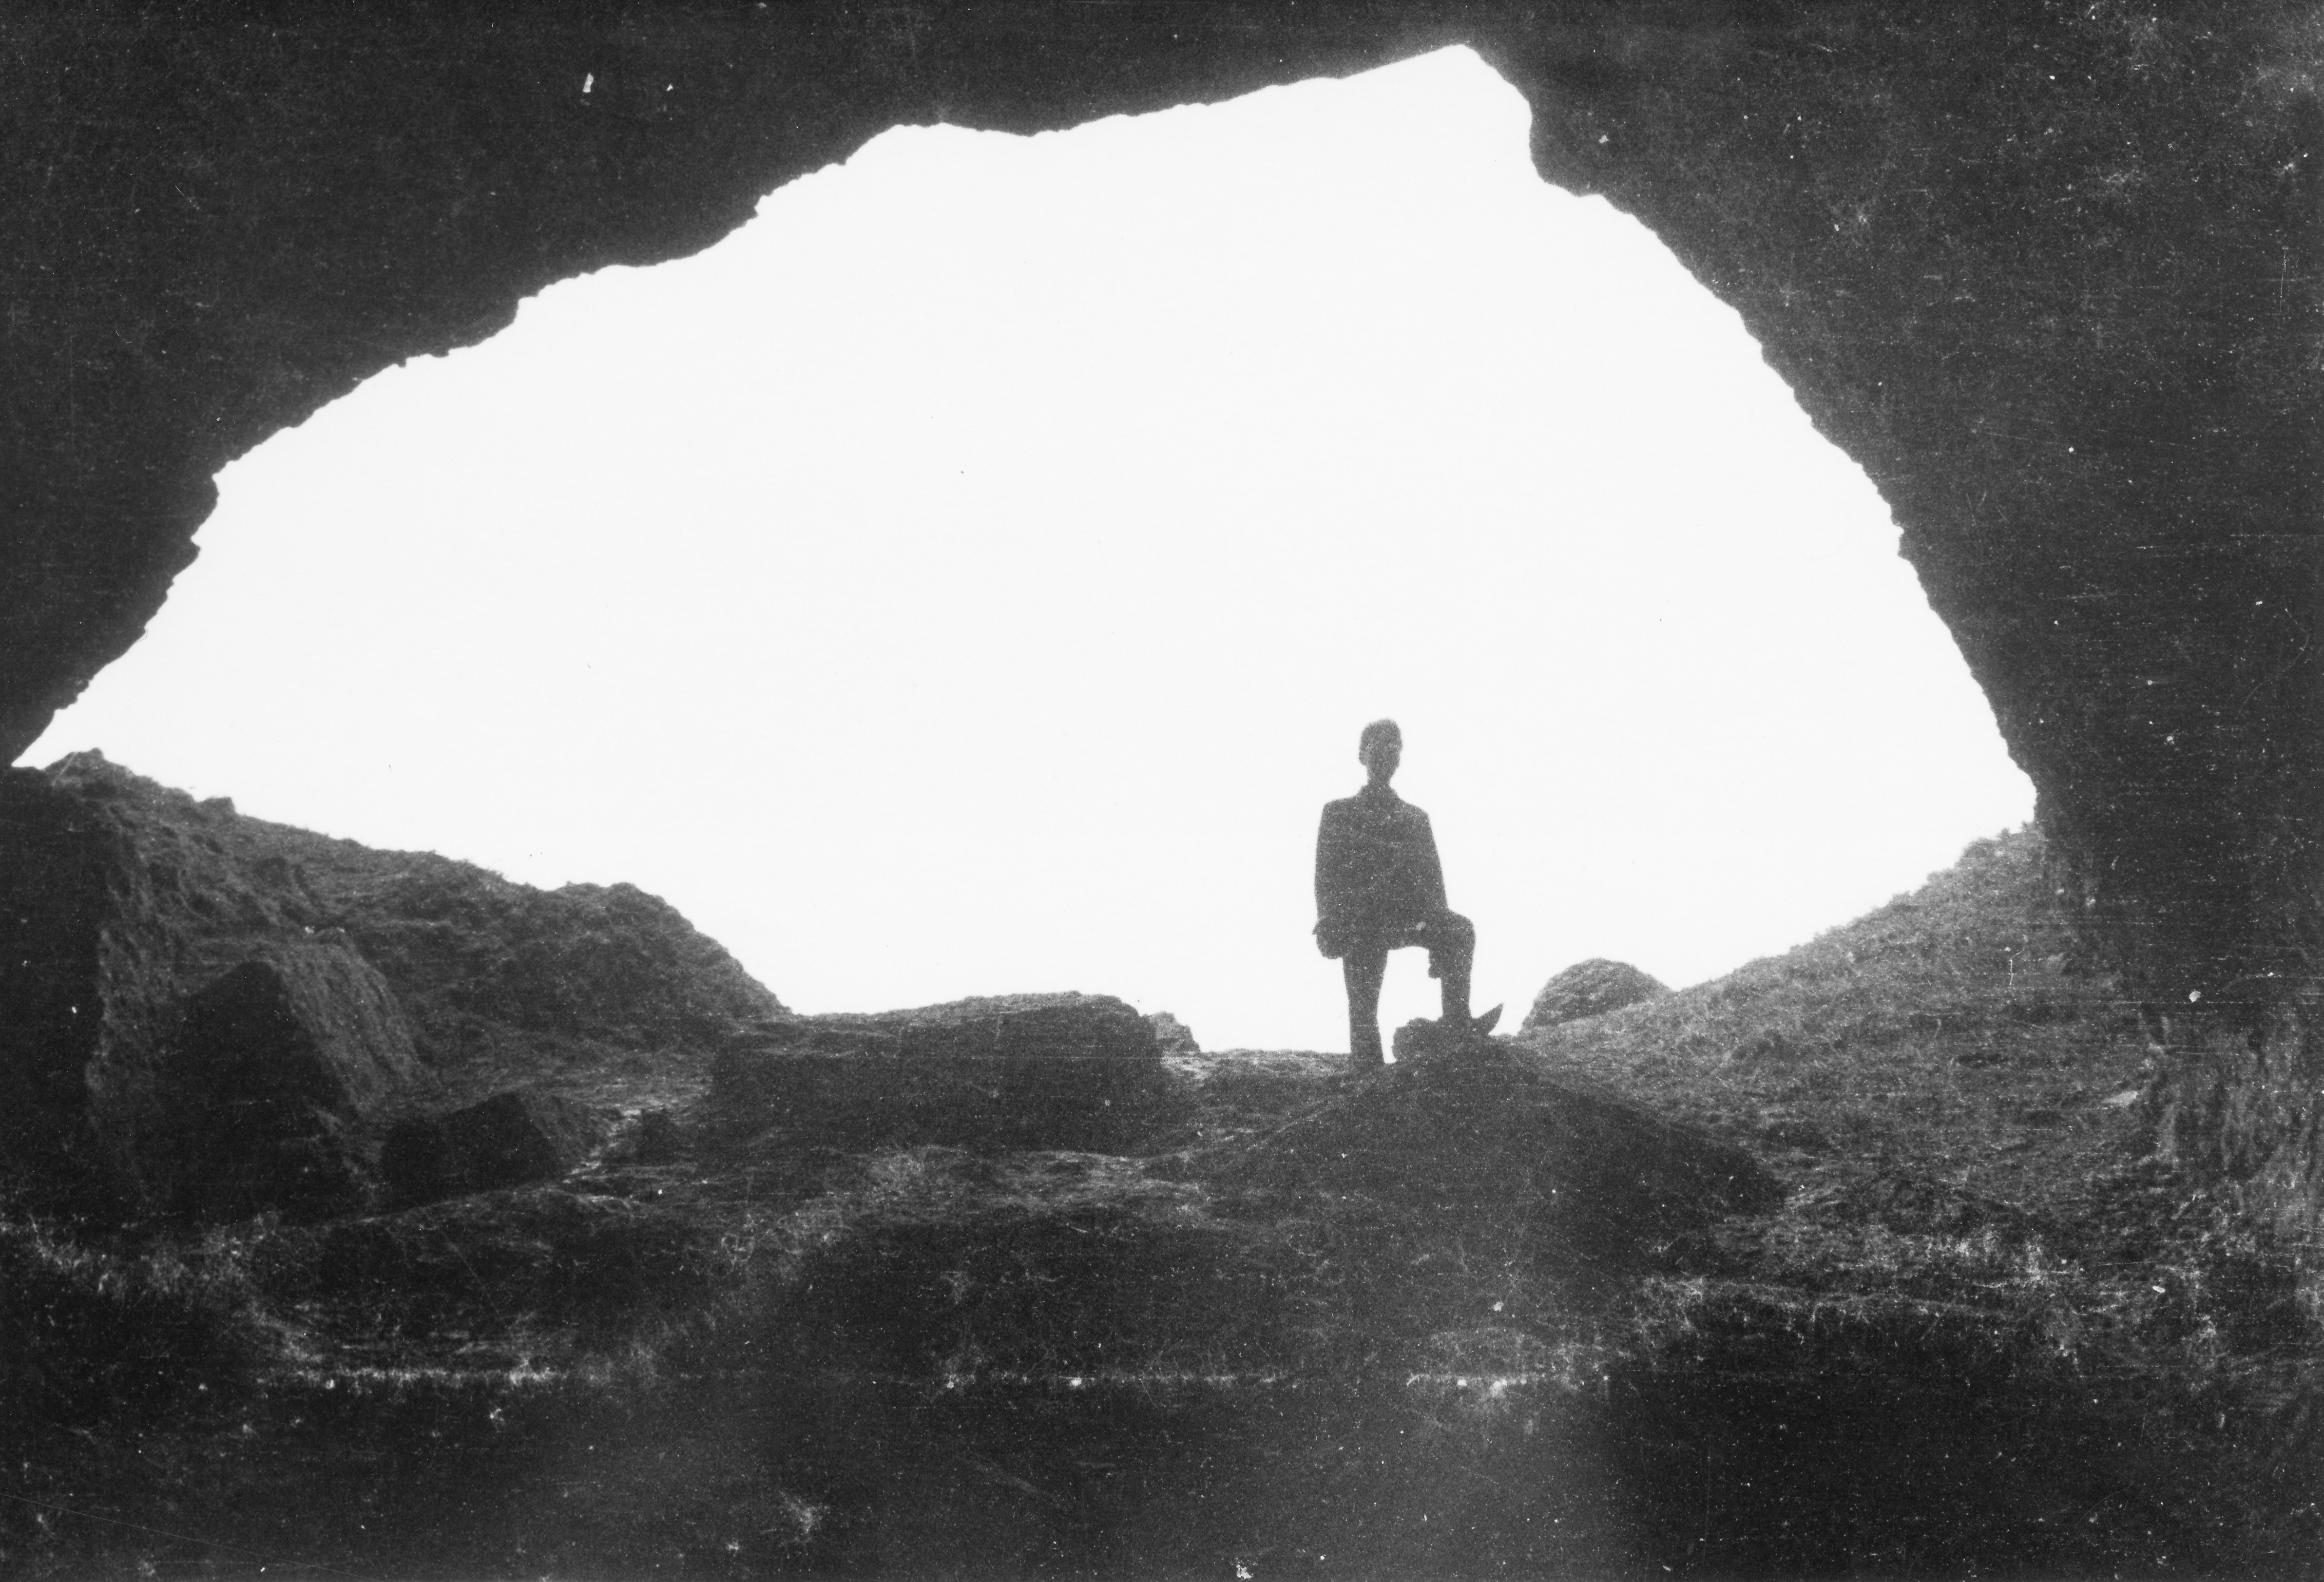
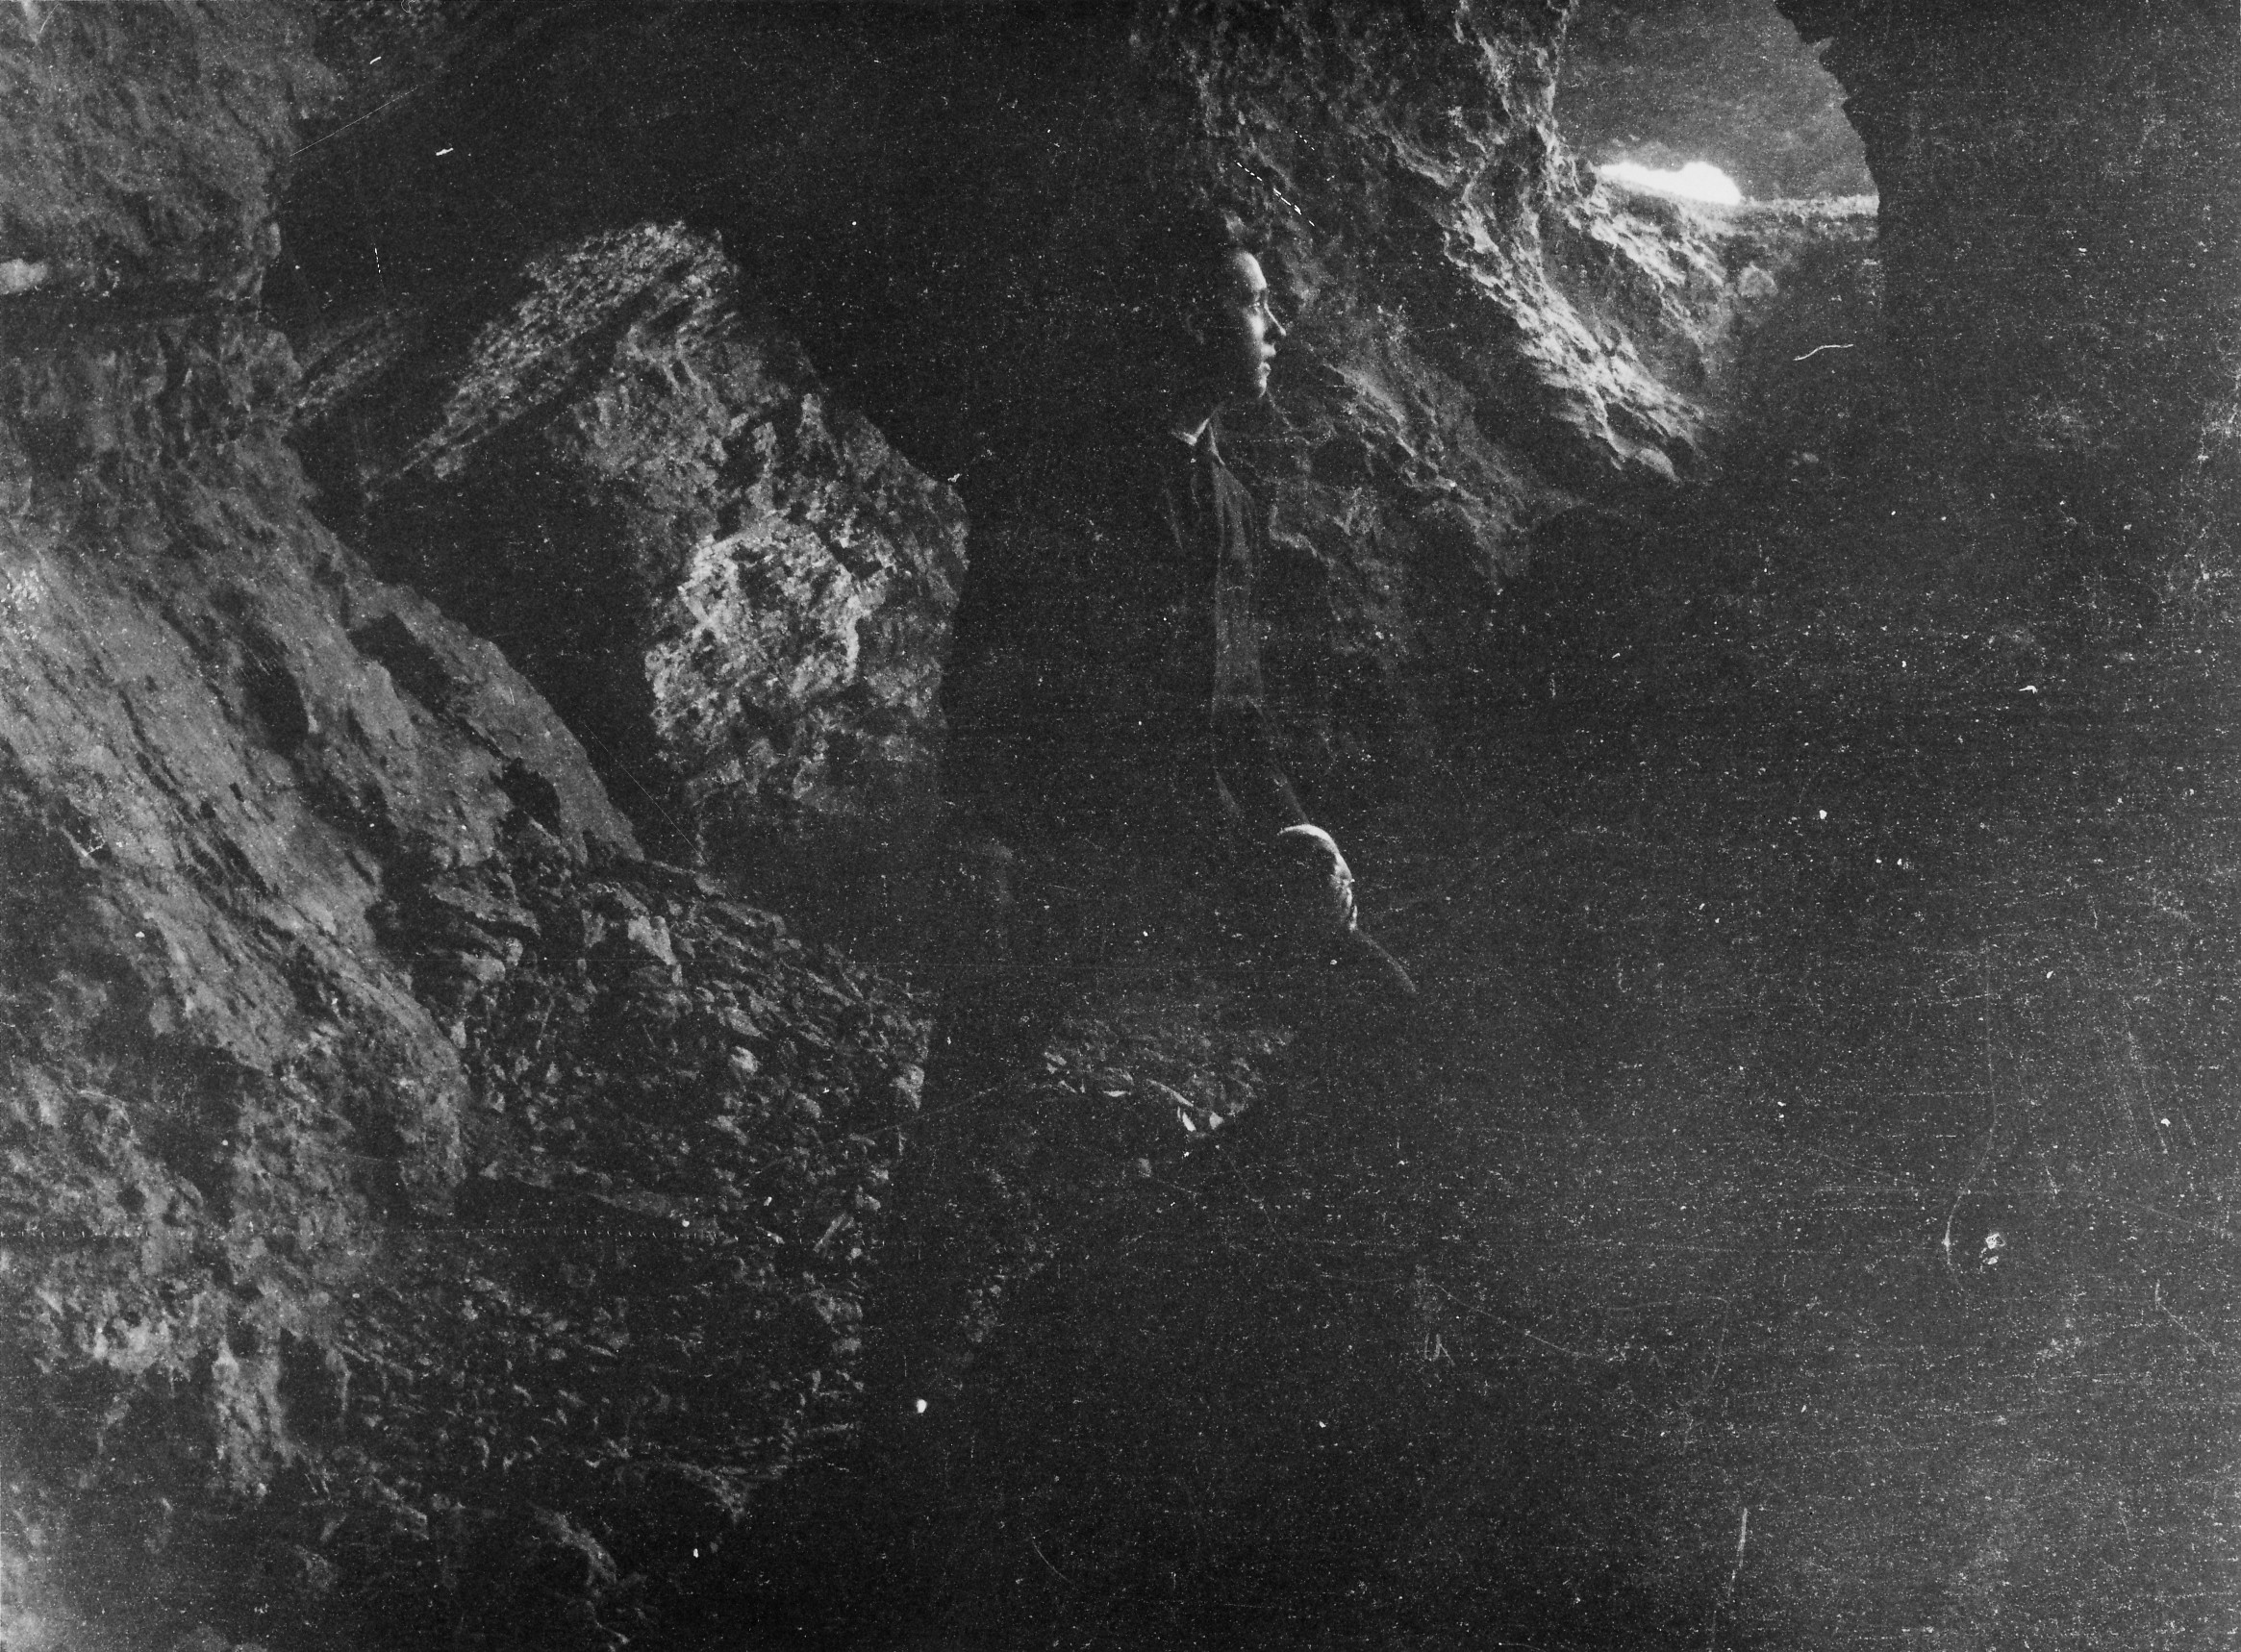
View from inside Devil’s Mouth Cavern. Photo taken in 1957 by Tony Ashwell. We are grateful to Tony for permission to use this photo.
The next photograph provides a rare image of the interior of Devil’s Mouth Cavern and shows some of the roof supporting pillars that were (along with the first two Seven Sisters Pillars – see below) demolished by explosives in 1961. Although the Marsh’s Quarry entrance can be seen in the background (top right), the main source of illumination of this scene was another opening situated in the vicinity of the first two Seven Sisters Pillars.
Devil’s Mouth Cavern. Photo taken by Tony Ashwell in 1957. We are grateful to Tony for permission to use this photo.
The first two Seven Sisters pillars view looking north west. Marsh’s Quarry is situated just beyond this (now demolished) exposure (top right corner of photo). Photo from the early 1950s.
In 1984 the attention of the authorities was drawn to the large crack (the result of the collapse of the underlying cavern) in the dislodged beds of the Lower Quarried Limestone Member and it was quickly decided to demolish the exposure.
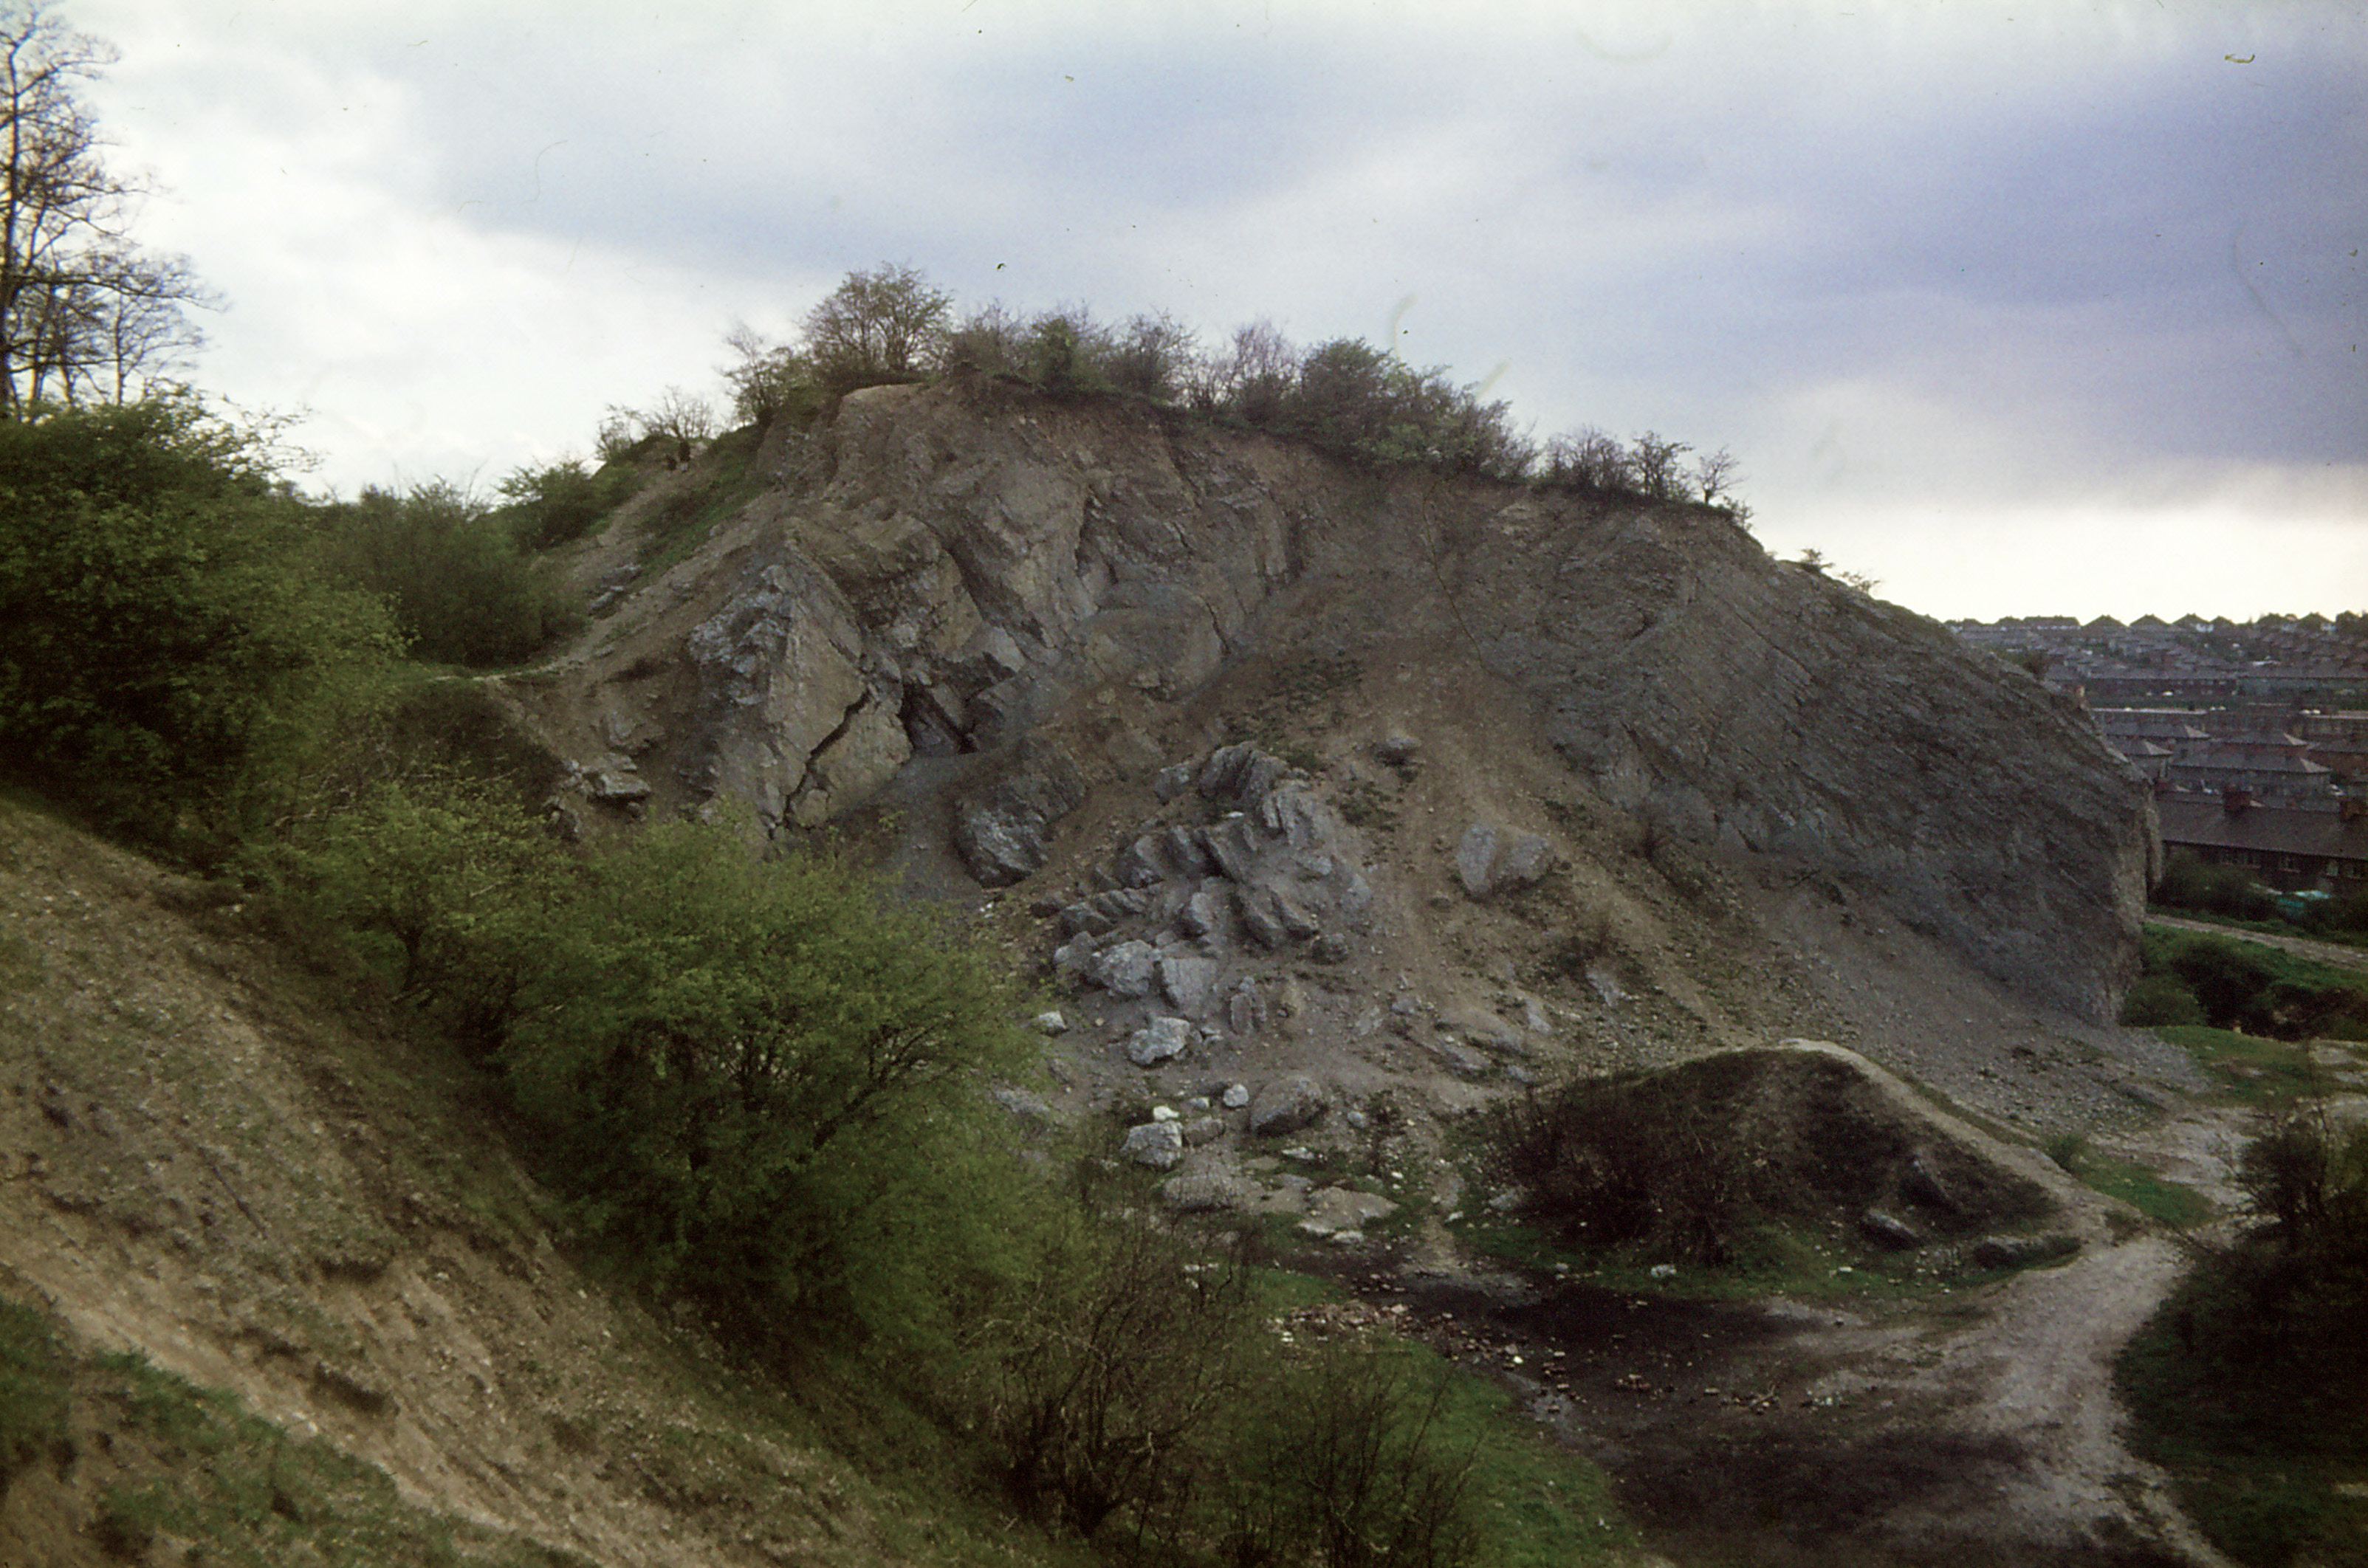
This shows the Lower Quarried Limestone Member/Nodular member as it was after the 1961 collapse of the underlying cavern. Photo taken in the early 1970s by Peter Parkes.
Closer view of the Lower Quarried Limestone Member showing the crack that caused concern a decade later (23 years after the event that caused it). Photo taken in the early 1970s by Peter Parkes.
The shattered remains of the Lower Quarried Limestone Member soon after demolition in 1984. Photo taken in 1984 by Peter Parkes.
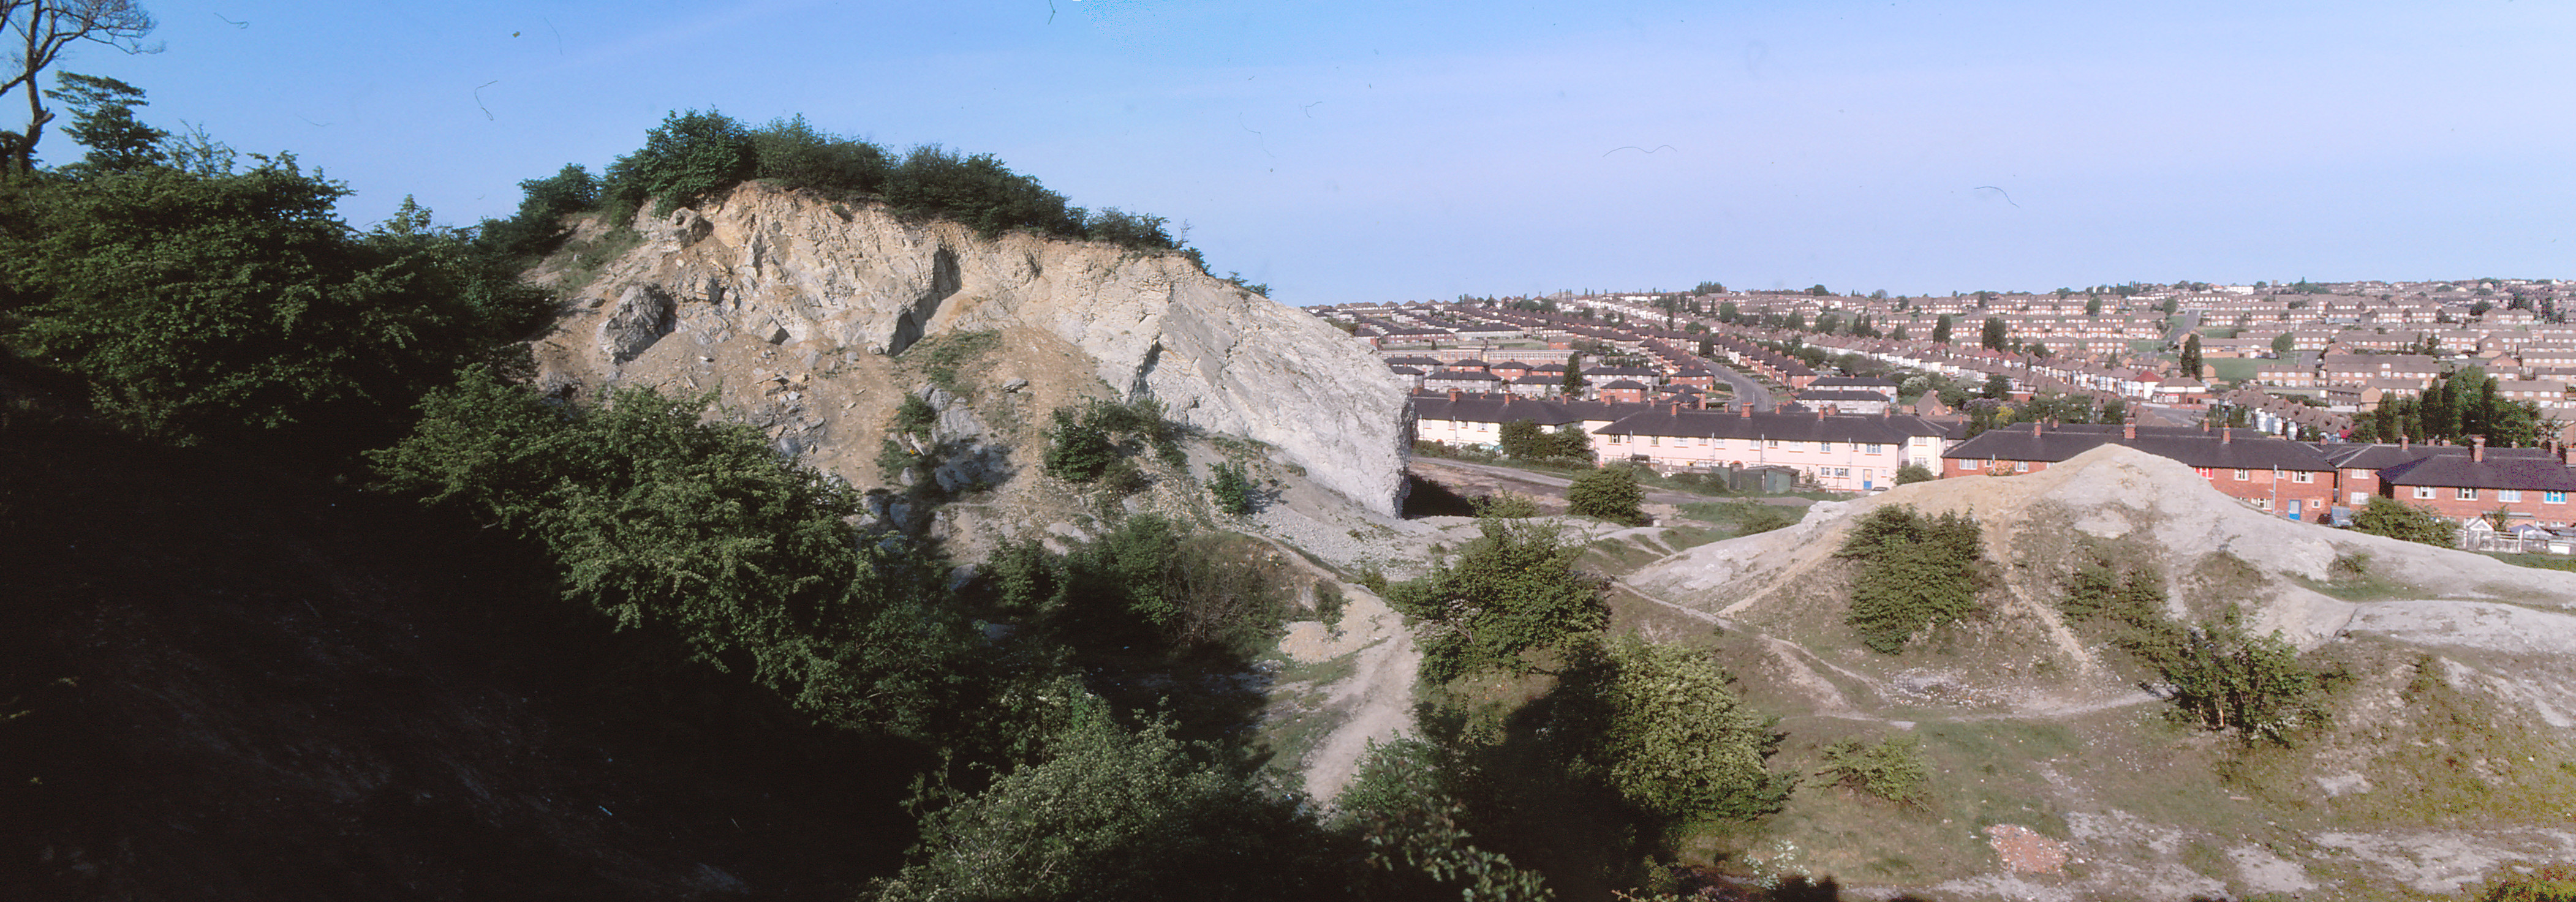
Panoramic view of Marsh’s Quarry showing rocks of the Much Wenlock Limestone Formation including a large reef mass (bioherm) on the right. Photo taken in 1984 by Peter Parkes.
The ridge running along the top of the housing estate forms part of the main watershed of England that separates the catchment areas of the River Severn and the River Trent. Rain falling beyond the ridge (western side) drains into the Bristol Channel via the River Stour and the River Severn, and rain falling this side of the ridge (eastern side) drains into the North Sea via the River Tame, River Trent, and the Humber Estuary.